Are you looking for an Electric Bicycle Conversion and a way to make your commute more efficient and environmentally friendly? If so, you may be considering converting your bike to electric. You should know a few things before you make the switch, though. This blog post will cover everything you need to know about converting a bike to electric, from the benefits to the cost. We’ll also give tips on making the conversion process as smooth and easy as possible. So if you’re ready to learn more about electric bikes, read on!

Click Image to Find Outdoor Products
Ebike Conversion Kits
Electric Bicycle Conversion and Electric bike conversion kits are a great way to convert your existing bicycle into an electric bike. There are a few different types of kits available on the market, so it’s essential to do some research to find the best one for your needs.
The motor is the most critical factor when choosing an electric bike conversion kit. Two main types of motors are available: hub motors and mid-drive motors. Hub motors are the most common motor used in electric bike conversion kits. They’re located in the front or rear wheel and only provide power to that wheel. On the other hand, Mid-drive motors are located in the middle of the bike frame and give strength to both wheels.
Another factor to consider is the battery type. The most common battery in electric bike conversion kits is lithium-ion batteries, but lead-acid and nickel-cadmium batteries are also available. Lithium-ion batteries tend to be more expensive, but they’re also much lighter and have a longer lifespan than other batteries.
Finally, you’ll need to decide on a controller for your electric bike conversion kit. Controllers regulate the power that goes from the battery to the motor. There are two main types of controllers: throttle controllers and pedal assist controllers. Throttle controllers allow you to control how much power goes to the engine by Twistgrip like a motorcycle throttle. Pedal assist controllers sense how hard you’re working.

Which Kit to Use in Electric Bicycle Conversion
If you’re looking to Electric Bicycle Conversion and convert your bike to electric, there are a few things you’ll need to consider before choosing which kit to use. First, consider what kind of range you need – how far do you plan to ride? Second, consider the terrain you’ll be riding on – is it primarily flat or hilly? Third, consider the weight of the kit and the bike – heavier equipment will require more power to ride up hills.
Once you’ve considered all these factors, you can start narrowing down your options. There are a few different types of electric bike conversion kits available on the market today:
1. Mid-drive kits: These kits mount the motor in the middle of the frame, near the pedals. This option gives them good balance and makes them ideal for riders who want to keep their original bike geometry. Mid-drive kits are more expensive than other types, but they’re also more powerful and efficient.
2. Wheel-drive kits mount the motor in the wheel hub, replacing the front or rear wheel. Wheel-drive kits are less expensive than mid-drive ones but are not as powerful or efficient. They’re a good option for riders who want an easy installation and don’t mind sacrificing some performance.
3. Friction-drive kits: These are the most straightforward and inexpensive type of electric bike conversion kit. They consist of a motor that mounts
What You Will Need for your Electric Bicycle Conversion
Assuming you have a basic understanding of bike mechanics, you will need the following tools and materials to convert a bike to electric:
- A wrench set
- A drill
- An electric motor
- A battery
- A controller
- Throttle
- Speed sensor
- Chain
- Sprockets
- Brackets
- Mounting hardware
You will also need access to a soldering iron and know how to use it.
Step One: Preparing the Bike
If you’re converting a bike to electric, the first step is to prep the bike. This step involves stripping it down to the frame, removing the pedals, and anything else that might get in the way of the conversion. You’ll also want to ensure the bike is clean and free of any rust or dirt that could potentially interfere with the conversion process. Once you’ve prepped the bike, you’re ready to move on to step two.
If you’re considering converting your bike to electric, the first step is to prepare your e-bike. This procedure ensures the cycle is in good condition and properly tuned. You’ll also want to consider what kind of motor and battery you’ll need for your conversion.
The most important part of preparing your bike for an electric conversion is ensuring it’s in good condition. This fact means tune-ups, lubing the chain, and checking the brakes. You don’t want to start your conversion with a bike already in bad shape.
You’ll also need to decide what kind of motor and battery you want for your conversion. There are a few different types of engines available, each with its advantages and disadvantages. The same goes for batteries – there are many different types available, each with pros and cons. Researching which motor and battery would be best for your specific conversion will go a long way in ensuring a successful transformation.
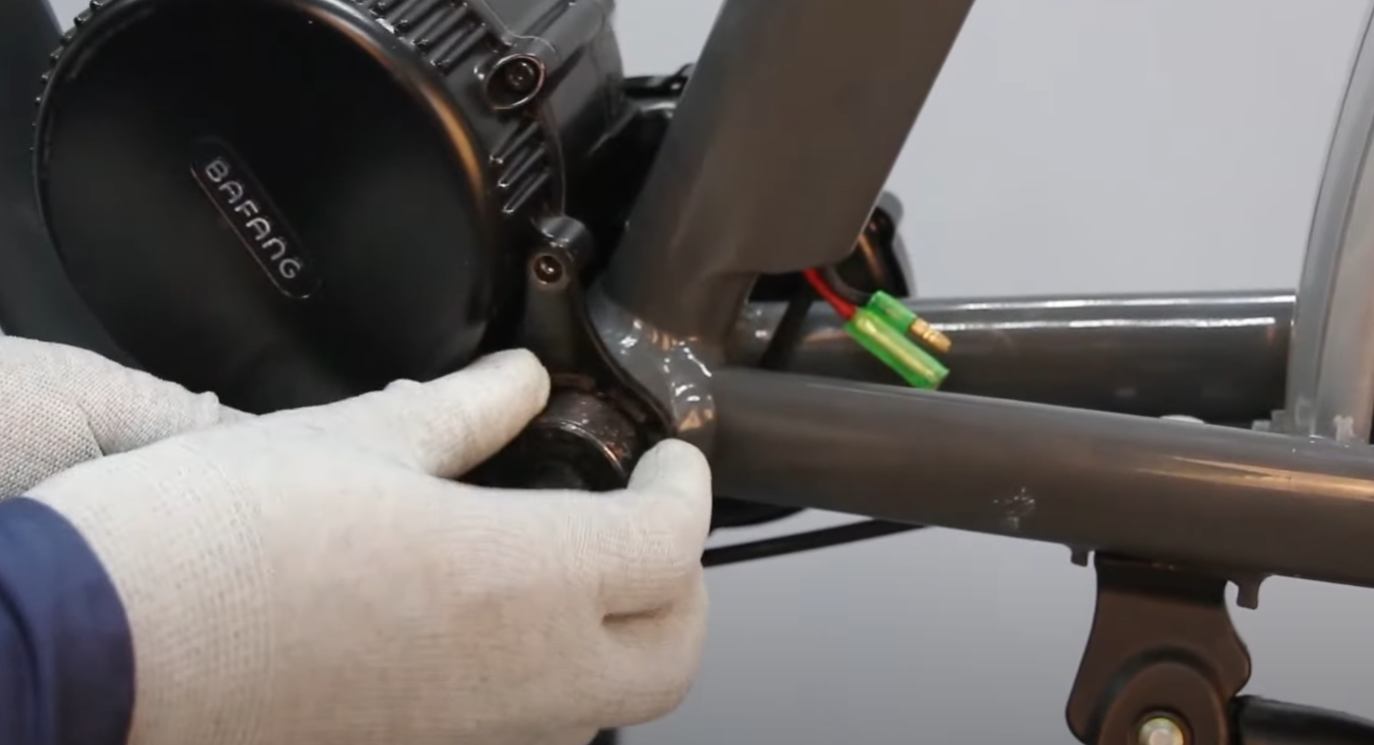
Step Two: Installing the Motor
Assuming you have all the necessary tools and parts, installing an electric motor on your bike is a relatively straightforward process that anyone can do. The first thing you need to do is remove the back wheel of your bike. Next, remove the cassette from the wheel if your bike has one. If not, remove the rear tire. Once the tire is off, you will be able to see the axle of the wheel.
Remove the axle nuts or quick-release skewer holding the wheel using a wrench. With the axle removed, you should now be able to slide the motor unit onto the dropouts of the frame where the wheel was just mounted. You must make sure the motor is aligned correctly before proceeding.
Once everything is in place, put the chain on top of the sprocket on the motor unit and thread it through until it meets your bike’s drive chain. You may need to adjust the tension on both chains so they are tight enough without being too close. The last thing you must do is put your back wheel back on and re-install your cassette (or rear tire). Please make sure everything is nice and snug before taking it out for a spin!
Step Three: Wiring the Controller
Assuming you understand electricity and wiring, the third step is to wire the controller. You will need to connect the battery-positive terminal to one side of the controller, and the motor leads to the other. Make sure that all connections are tight and secure.
If you are not confident in your ability to wire the controller, it is best to seek professional help. This part is essential in the process, as improper wiring can damage or even fire.
Step Four: Attaching the Throttle
After installing the motor, it’s time to attach the throttle. As a simple process, a few things to remember.
First, make sure the throttle is compatible with the motor. Most throttles will work with most engines, but it’s always best to double-check before proceeding.
Next, attach the throttle to the handlebars. Some throttles come with mounting brackets, while others must be zip-tied or attached to the bars.
Finally, connect the throttle wire to the motor controller. This step is usually simple: plugging in a connector, but consult your manual for specific instructions.
Step Five: Testing It Out
After you’ve installed the motor and battery, it’s time to take it for a test drive! Ensure you have all the necessary safety gear, including a helmet, before getting on your bike. If everything looks and feels good, slowly start to pedal. You should feel the motor start to engage and give you a boost. If not, double-check all your connections and make sure the motor is on.
Now that you know your electric bike is working correctly, it’s time to enjoy the ride! Remember to take it easy as you get used to the new power under your feet. With a bit of practice, you’ll be zipping around town in no time!
Conclusion for Electric Bicycle Conversion
You can easily convert a bike to electric with a bit of work. This process is not complicated. You can do it in a few hours with the right tools. By following these steps, you can have an electric bike that will provide you with many benefits, including saving money on gas, being more environmentally friendly, and having more fun while riding!